UITableView customization in iOS9 with Xcode
In the previous we saw how to create a post with image and store in Parse. In this tutorial we will see how we can list all the items.
Let's drag in a UITableViewController in the main storyboard -> go to editor embed in Navigation Controller. At this point let increase the height of the UITableViewcell set the height to 170 in the size inspector.
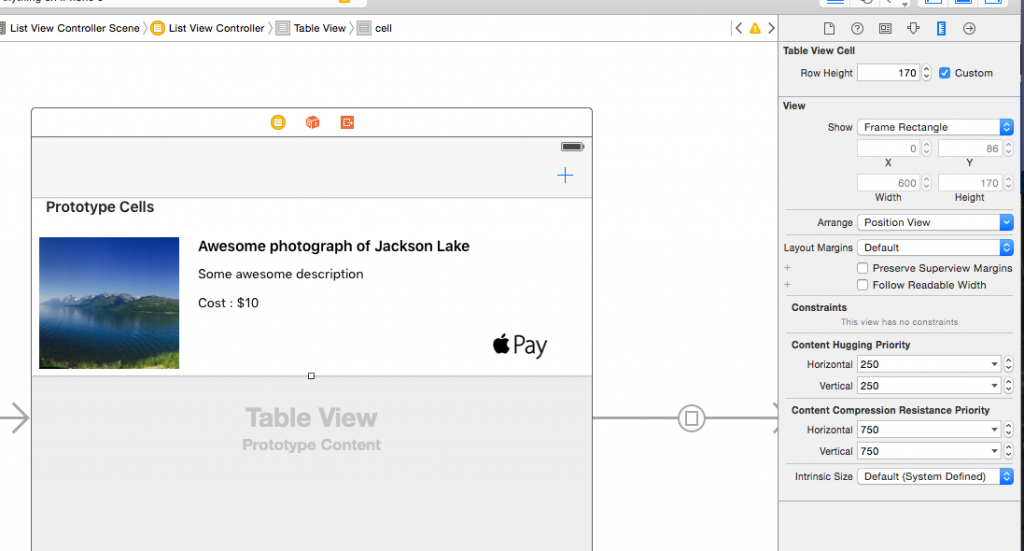
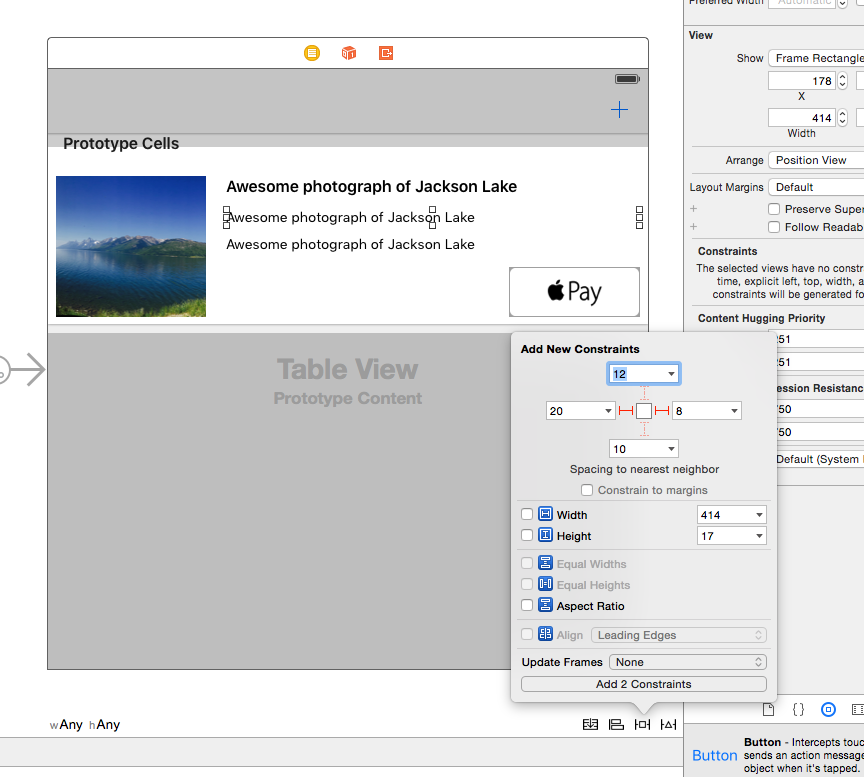
The next thing would be to drag the UIImageview and the label along with the button. You can download the apple pay resources here Apple pay resources. Add the necessary image to Assets in Xcode by dragging the required images into xcode. Next we will go into how we can setup the autolayouts for all the labels and the button
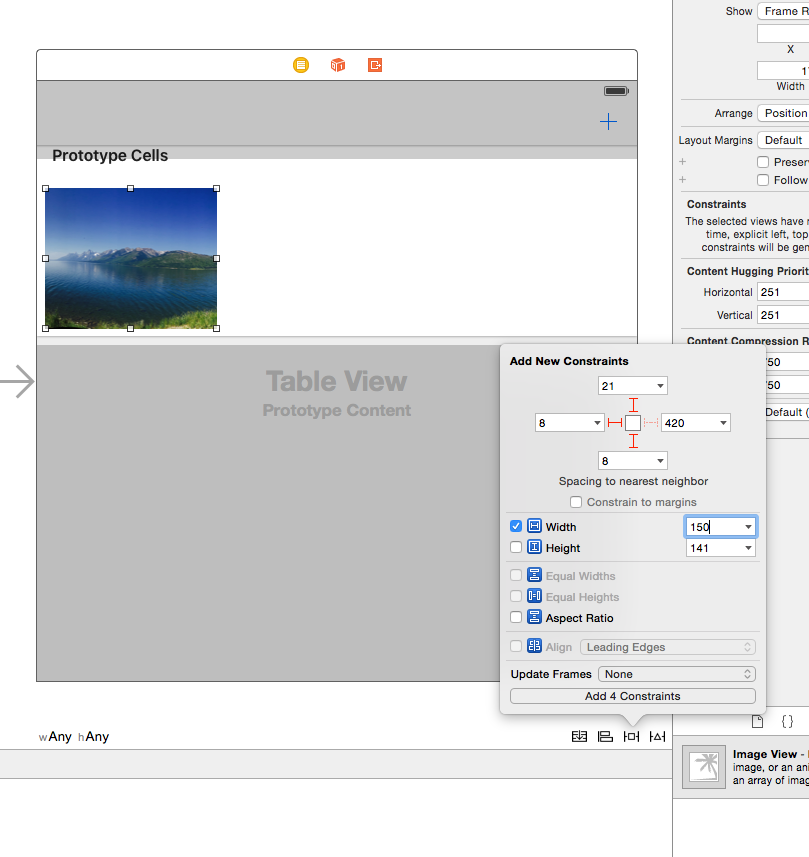
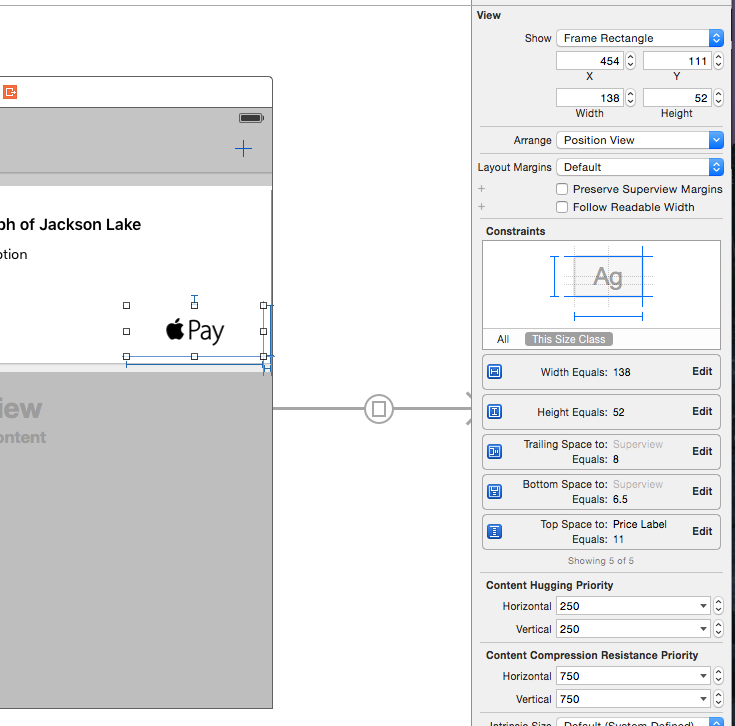
Here are the constraints for the UIImageView and the labels. I have intentionally left adding a few constraints. Play around to figure out the constraints and if you are confused let me know. Also note that for all the Labels if you set the content hugging and content compression property to default then xcode will tell you that it's unable to resolve auto layout constraints. Content Hugging and Content compression property help the auto layout system by giving priority to some elements as compared to others to statisfy the constraints. In our case if you see warning in the xcode try to decrease the content hugging property to the description and the price labels.
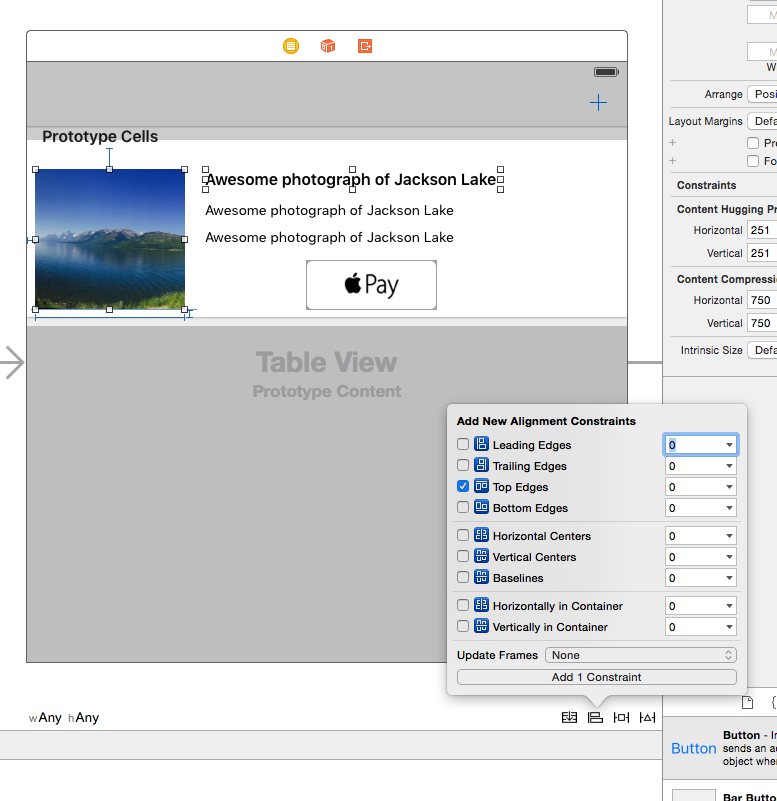
Similarly now for the UIButton . Go to the attribute inspect and change the image to the apple pay image.
Now that we have designed the UI. Lets see how we can start display the items in the UITableView.
To get started create a UITableViewCell custom class and call it TableViewCell. Go to the Main.storyboard and set the class of the UITableViewCell to the new created TableViewCell. Create IBOutlets from all the Labels and the UIImageView. Also create an IBAction from the Apple pay button to the TableViewCell and call it buy
//
//  TableViewCell.swift
//  SellAnything
//
//  Created by Shrikar Archak on 7/14/15.
//  Copyright © 2015 Shrikar Archak. All rights reserved.
//

import UIKit

class TableViewCell: UITableViewCell {

    @IBOutlet weak var itemImageView: UIImageView!
    @IBOutlet weak var title: UILabel!

    @IBOutlet weak var info: UILabel!


    @IBOutlet weak var priceLabel: UILabel!
    override func awakeFromNib() {
        super.awakeFromNib()
        // Initialization code
    }

    override func setSelected(selected: Bool, animated: Bool) {
        super.setSelected(selected, animated: animated)

        // Configure the view for the selected state
    }

    @IBAction func buy(sender: AnyObject) {

    }
}
To map the parse object into a Domain Object we will create a new struct called Item.
//
//  Item.swift
//  SellAnything
//
//  Created by Shrikar Archak on 7/12/15.
//  Copyright © 2015 Shrikar Archak. All rights reserved.
//

import Foundation
import Parse

struct Item {
    var title: String!
    var info: String!
    var price : Double!
    var imageData : NSData!
    var thumbnailData : NSData!

    init(title: String, info: String, price : Double, imageData : NSData, thumbnailData: NSData) {
        self.title = title
        self.info = info
        self.price = price
        self.imageData = imageData
        self.thumbnailData = thumbnailData
    }

    init(obj : PFObject){
        self.title = obj.valueForKey("title") as! String
        self.info = obj.valueForKey("info") as! String
        self.price = obj.valueForKey("price") as! Double
        let tfile = obj.objectForKey("itemImage") as! PFFile
        self.imageData = tfile.getData()
        let thumbfile = obj.objectForKey("thumbnailImage") as! PFFile

        self.thumbnailData = thumbfile.getData()


    }
}
Create a new class which subclasses UITableViewController and call it ListViewController. Here is the code for the ListViewController
//
//  ListViewController.swift
//  SellAnything
//
//  Created by Shrikar Archak on 7/14/15.
//  Copyright © 2015 Shrikar Archak. All rights reserved.
//

import UIKit
import Parse

class ListViewController: UITableViewController{

    var query = PFQuery(className: "Item")
    var items :\[Item\]? = \[\]
    override func viewDidLoad() {
        super.viewDidLoad()
        query.orderByDescending("createdAt")
        query.findObjectsInBackgroundWithBlock { (data: \[AnyObject\]?, error) -> Void in
            let objects = data as! \[PFObject\]
            for tmp in objects {
                print(tmp.valueForKey("info"))
                self.items?.append(Item(obj: tmp))
            }
            print(self.items?.count)
            dispatch\_async(dispatch\_get\_main\_queue(), { () -> Void in
                self.tableView.reloadData()
            })

        }


    }

    override func didReceiveMemoryWarning() {
        super.didReceiveMemoryWarning()

    }

    // MARK: - Table view data source

    override func numberOfSectionsInTableView(tableView: UITableView) -> Int {
        return 1
    }

    override func tableView(tableView: UITableView, numberOfRowsInSection section: Int) -> Int {
        if let titems = items {
            print("REturning \\(titems.count)")
            return titems.count
        }
        return 0
    }

    override func tableView(tableView: UITableView, cellForRowAtIndexPath indexPath: NSIndexPath) -> UITableViewCell {
        let cell = tableView.dequeueReusableCellWithIdentifier("cell", forIndexPath: indexPath) as! TableViewCell
        let item = self.items!\[indexPath.row\]

        cell.itemImageView.image = UIImage(data: item.imageData)
        cell.title.text = item.title
        cell.info.text = item.info
        cell.priceLabel.text = "$\\(item.price)"
        print("Got some data")
        return cell
    }

}