Uber Part 2 : CoreLocation and MapKit
In this tutorial we will use CoreLocation and Mapkit to get the current user location , set the map zoomed in on the current location and we should be able to get the location updated when we pan the mapview. This updated location is what we will be using for pickup. This is the part 2 so make sure you check Part1 before we continuing further.
Before we go ahead create neccessary outlets for mapView, driverView and address.
CoreLocation
We will be using the latest method on the CoreLocation Manager called requestLocation which we will use to get the current Location only once instead of monitoring for the location changes continously.
Also we need to set the necessary setup for getting corelocation to work . For more information take a look at how to set this up . We also need to implement the CLLocationManagerDelegate which is necessary to get the location updates. In thedidUpdateLocation we find the first location and set themapview region to zoom in on our current location with the location as the center and 1500meter span. Here are the parameters for the MKCoordinateRegionMakeWithDistance method.
Parameters
<table class="t1" cellspacing="0" cellpadding="0"><tbody><tr><td class="td1" valign="top"><p class="p2"><span class="s1"><i>centerCoordinate</i></span></p></td><td class="td2" valign="middle"><p class="p3"><span class="s1">The center point of the new coordinate region.</span></p></td></tr><tr><td class="td3" valign="top"><p class="p2"><span class="s1"><i>latitudinalMeters</i></span></p></td><td class="td4" valign="middle"><p class="p3"><span class="s1">The amount of north-to-south distance (measured in meters) to use for the span.</span></p></td></tr><tr><td class="td5" valign="top"><p class="p2"><span class="s1"><i>longitudinalMeters</i></span></p></td><td class="td6" valign="middle"><p class="p3"><span class="s1">The amount of east-to-west distance (measured in meters) to use for the span.</span></p></td></tr></tbody></table>MapKit
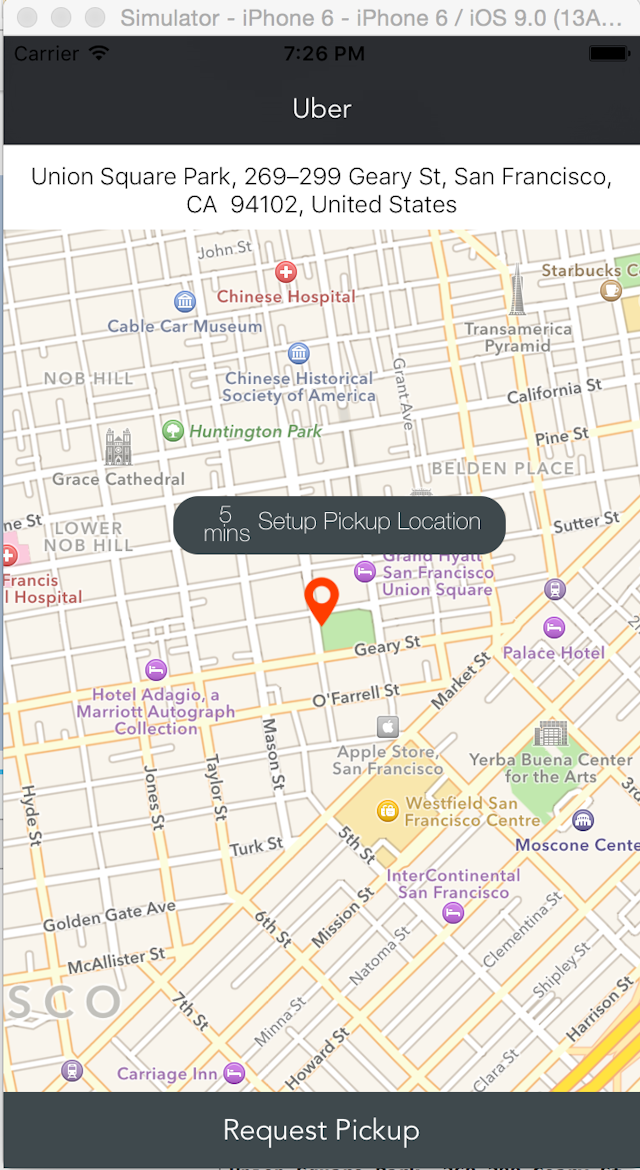
MapView has a property called centerCoordinate which we can use as a reference for the pickup location. Also if you see the realuber app we can see that there is one marker which in our case in the location marker and we can pan themapview to set the pickup location as per our need. To get the update centerCoordinate we need to implement the MKMapViewDelegate protocol and implement the method regionDidChangeAnimated .
Also it wouldn't make sense to show the latitude and longitude to the user so we need to reverseGeocode the latitude and longitude into the a human readable address and update the address label.
One more thing to note about the CLGeocode is that only one request can be active at any point in time so we need to cancel any existing geocoding request before submitting for more.
    func geoCode(location : CLLocation!){
        /\* Only one reverse geocoding can be in progress at a time hence we need to cancel existing
        one if we are getting location updates \*/
        geoCoder.cancelGeocode()
        geoCoder.reverseGeocodeLocation(location, completionHandler: { (data, error) -> Void in
            guard let placeMarks = data as \[CLPlacemark\]! else {
                return
            }
            let loc: CLPlacemark = placeMarks\[0\]
            let addressDict : \[NSString:NSObject\] = loc.addressDictionary as! \[NSString: NSObject\]
            let addrList = addressDict\["FormattedAddressLines"\] as! \[String\]
            let address = ", ".join(addrList)
            print(address)
            self.address.text = address
            self.previousAddress = address
        })

    }

    func locationManager(manager: CLLocationManager, didUpdateLocations locations: \[CLLocation\]) {
        let location: CLLocation = locations.first!
        self.mapView.centerCoordinate = location.coordinate
        let reg = MKCoordinateRegionMakeWithDistance(location.coordinate, 1500, 1500)
        self.mapView.setRegion(reg, animated: true)
        geoCode(location)
    }


    func locationManager(manager: CLLocationManager, didFailWithError error: NSError) {
        print(error)
    }

    func mapView(mapView: MKMapView, regionDidChangeAnimated animated: Bool) {
        let location = CLLocation(latitude: mapView.centerCoordinate.latitude, longitude: mapView.centerCoordinate.longitude)
        geoCode(location)
    }
Also create an IBAction for the request pickup. This is where we implement the logic of submitting the pickup request to the backend which will be sent to the driver app and then the we display the information of the selected driver. In our case for the simulation purpose we create a dummy view which is hidden and then after the request button is clicked after 3 seconds we change the hidden property to false. In the next part of the tutorial we will see how to build custom views.
<iframe src="https://www.youtube.com/embed/S_LhKDWIRPE" width="420" height="315" frameborder="0" allowfullscreen="allowfullscreen"></iframe>