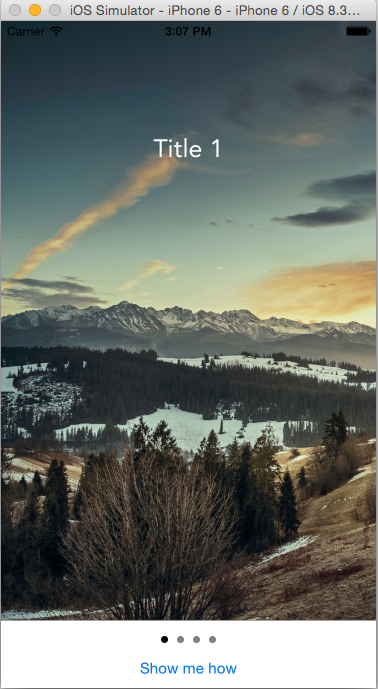
iOS Swift Tutorial: UIPageViewController as user onboarding tool
<Image alt="iOS Swift Tutorial: UIPageViewController as user onboarding tool" objectFit="contain" src="/static/images/Screen-Shot-2015-05-02-at-3.07.28-PM.png" height={350} width={1000} placeholder="blur" quality={100} />
<iframe src="http://www.youtube.com/embed/nuAFywTTU8g" width="420" height="315" frameborder="1" allowfullscreen="allowfullscreen" ></iframe>UIPageViewController is another system provided view controller which can be used in a set of different usecases.
A page view controller lets the user navigate between pages of content, where each page is managed by its own view controller object. Navigation can be controlled programmatically by your app or directly by the user using gestures. When navigating from page to page, the page view controller uses the transition that you specify to animate the change.
The data source for a page view controller is responsible for providing the content view controllers on demand and must conform to the UIPageViewControllerDataSource protocol. The delegate object—an object that conforms to the UIPageViewControllerDelegate protocol—provides some appearance-related information and receives notifications about gesture-initiated transitions.
To understand the benefits of UIPageViewController lets go ahead and take a look at how mobile apps are onboarding users these days User Onboarding - Mobile Patterns or User Onboarding - Pttrns
Now that we know the use cases lets go ahead and implement them in our own app.
-
Create a single view application
-
On the main storyboard drag a PageViewController and a UIViewController as shown below
<Image alt="iOS Swift Tutorial: UIPageViewController as user onboarding tool" objectFit="contain" src="/static/images/pg1.png" height={350} width={1000} placeholder="blur" quality={100} />
-
Then drag a UIImageView and place it on the UIViewController followed by a label on top of it.
-
At this point create a new file which is a subclass of UIViewController and give it a name PageContentViewController
-
Select the PageViewController and assign it a storyboard id PageViewController also select the attributes inspector and change the scroll direction to horizontal and the transition style to Scroll. <Image alt="iOS Swift Tutorial: UIPageViewController as user onboarding tool" objectFit="contain" src="/static/images/pg2.png" height={350} width={1000} placeholder="blur" quality={100} />
<Image alt="iOS Swift Tutorial: UIPageViewController as user onboarding tool" objectFit="contain" src="/static/images/pg4.png" height={350} width={1000} placeholder="blur" quality={100} />
- Similarly select the UIViewController you added and change the Storyboard id to PageContentViewController and also the class to PageContentViewController <Image alt="iOS Swift Tutorial: UIPageViewController as user onboarding tool" objectFit="contain" src="/static/images/pg3.png" height={350} width={1000} placeholder="blur" quality={100} />
At this point we have setup the layout for the app.
You might also like Building a photography inspiration app using Swift
Setting up PageContentViewController
In our page content view controller we had a label and an imageview.. Lets go ahead and create the IBOutlet. Open the Assistant Editor and CTRL+Drag from each of the UIelements to the PageContentViewController.swift file. Also PageContentViewController has the a few properties like the current Image, current Label, and what index the pageviewcontroller is showing. To maintain the state lets create those variables. At this point your page content view controller should look like this
<Image alt="iOS Swift Tutorial: UIPageViewController as user onboarding tool" objectFit="contain" src="/static/images/pg6.png" height={350} width={1000} placeholder="blur" quality={100} />
//
//  PageContentViewController.swift
//  UIPageViewController
//
//  Created by Shrikar Archak on 1/15/15.
//  Copyright (c) 2015 Shrikar Archak. All rights reserved.
//

import UIKit

class PageContentViewController: UIViewController {

    @IBOutlet weak var heading: UILabel!
    @IBOutlet weak var bkImageView: UIImageView!

    var pageIndex: Int?
    var titleText : String!
    var imageName : String!

    override func viewDidLoad() {
        super.viewDidLoad()
        self.bkImageView.image = UIImage(named: imageName)
        self.heading.text = self.titleText
        self.heading.alpha = 0.1
        UIView.animateWithDuration(1.0, animations: { () ->; Void in
            self.heading.alpha = 1.0
        })

    }
}
Setting up the UIPageViewController
Now lets go ahead and conform to UIPageViewControllerDataSource by implementing the necessary functions. When you created the project there was a default ViewController.swift and a ViewController on the storyboard we will be using those to setup our UIPageViewController.
Required functions
pageViewController:viewControllerAfterViewController: pageViewController:viewControllerBeforeViewController:
AfterViewController and BeforeViewController are used for paging through a set of viewcontrollers.viewControllerAtIndex function just checks if the index is within valid bounds and return the viewcontroller at that index. Similarly the viewControllerAfterViewController and viewControllerBeforeViewController check for the index within bounds and paginate through the view controllers either by incrementing/decrementing the index. If the index is outside the bounds we return nil.
Make sure you set the pageviewcontroller delegate to self in this case.
//
//  ViewController.swift
//  UIPageViewController
//
//  Created by Shrikar Archak on 1/15/15.
//  Copyright (c) 2015 Shrikar Archak. All rights reserved.
//

import UIKit

class ViewController: UIViewController, UIPageViewControllerDataSource, UIPageViewControllerDelegate {

    let pageTitles = \["Title 1", "Title 2", "Title 3", "Title 4"\]
    var images = \["long3.png","long4.png","long1.png","long2.png"\]
    var count = 0

    var pageViewController : UIPageViewController!

    @IBAction func swipeLeft(sender: AnyObject) {
        println("SWipe left")
    }
    @IBAction func swiped(sender: AnyObject) {

        self.pageViewController.view .removeFromSuperview()
        self.pageViewController.removeFromParentViewController()
        reset()
    }

    func reset() {
        /\* Getting the page View controller \*/
        pageViewController = self.storyboard?.instantiateViewControllerWithIdentifier("PageViewController") as UIPageViewController
        self.pageViewController.dataSource = self

        let pageContentViewController = self.viewControllerAtIndex(0)
        self.pageViewController.setViewControllers(\[pageContentViewController!\], direction: UIPageViewControllerNavigationDirection.Forward, animated: true, completion: nil)

         /\* We are substracting 30 because we have a start again button whose height is 30\*/
        self.pageViewController.view.frame = CGRectMake(0, 0, self.view.frame.width, self.view.frame.height - 30)
        self.addChildViewController(pageViewController)
        self.view.addSubview(pageViewController.view)
        self.pageViewController.didMoveToParentViewController(self)
    }

    @IBAction func start(sender: AnyObject) {
        let pageContentViewController = self.viewControllerAtIndex(0)
        self.pageViewController.setViewControllers(\[pageContentViewController!\], direction: UIPageViewControllerNavigationDirection.Forward, animated: true, completion: nil)
    }

    override func viewDidLoad() {
        super.viewDidLoad()
        reset()
    }

    override func didReceiveMemoryWarning() {
        super.didReceiveMemoryWarning()
        // Dispose of any resources that can be recreated.
    }

    func pageViewController(pageViewController: UIPageViewController, viewControllerAfterViewController viewController: UIViewController) ->; UIViewController? {

        var index = (viewController as PageContentViewController).pageIndex!
        index++
        if(index >= self.images.count){
            return nil
        }
        return self.viewControllerAtIndex(index)

    }

    func pageViewController(pageViewController: UIPageViewController, viewControllerBeforeViewController viewController: UIViewController) ->; UIViewController? {

        var index = (viewController as PageContentViewController).pageIndex!
        if(index <= 0){
            return nil
        }
        index--
        return self.viewControllerAtIndex(index)

    }

    func viewControllerAtIndex(index : Int) ->; UIViewController? {
        if((self.pageTitles.count == 0) || (index >= self.pageTitles.count)) {
            return nil
        }
        let pageContentViewController = self.storyboard?.instantiateViewControllerWithIdentifier("PageContentViewController") as PageContentViewController

        pageContentViewController.imageName = self.images\[index\]
        pageContentViewController.titleText = self.pageTitles\[index\]
        pageContentViewController.pageIndex = index
        return pageContentViewController
    }

    func presentationCountForPageViewController(pageViewController: UIPageViewController) ->; Int {
        return pageTitles.count
    }

    func presentationIndexForPageViewController(pageViewController: UIPageViewController) ->; Int {
        return 0
    }

}