Build your own Uber app in Swift
In this month's tutorial we will be building the uber user side app. The key concept you will be learning are
- CoreLocation
- MapKit
- Custom Views
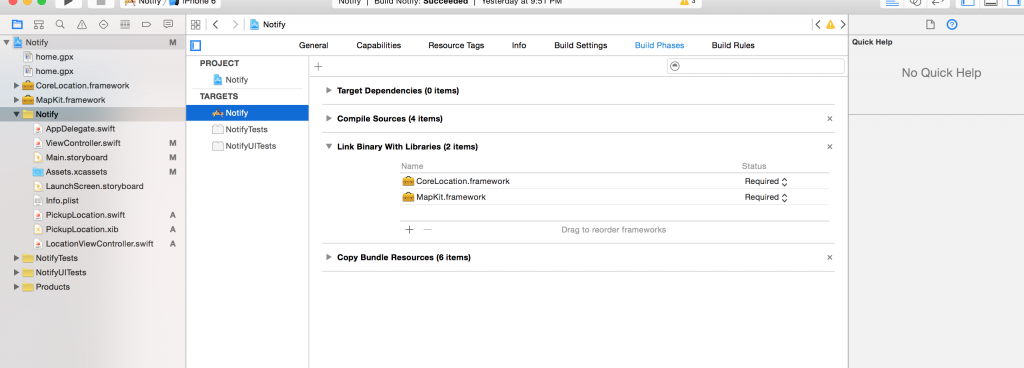
Before we start lets go to the Build Phase and add CoreLocation and MapKit framework to our app. Also make sure your application allow location simulation.

To begin with let's create a new project. Select the ViewController on the Mainstoryboard -> go to embed in -> Navigation Controller. Now we can start adding all the necessary UIKit elements to the storyboard.
First thing is to create a new Image Asset for the location icon. I personally use Icons8 App for all my icon needs.
- Select Assets.xcassets
- Click on the + icon and drag the location icon on to the 2x and 3x assets

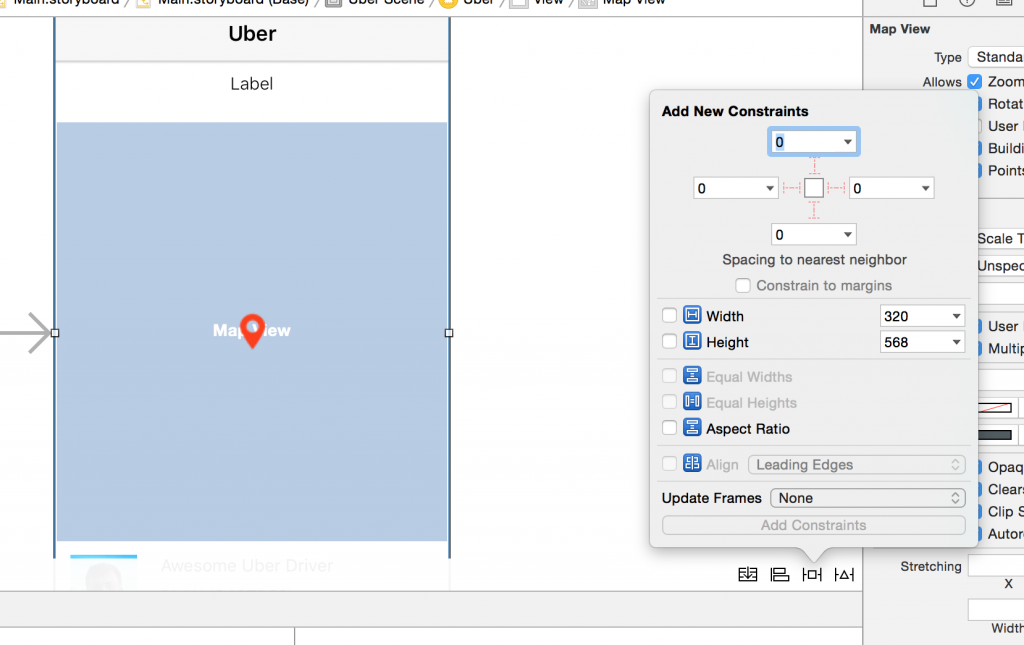
At this point lets go ahead and drag a MapView onto the ViewController in the mainstoryboard. With the mapview selected set the autolayout constraints to 0 on all sides and update the frame if required.
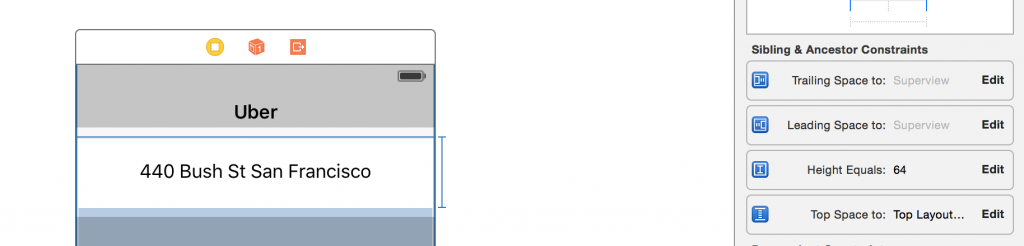
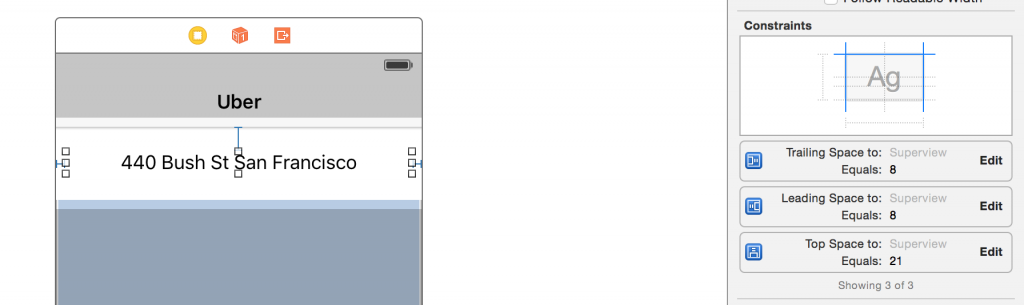
Now drag a UIView on to the view controller to the top just below the Navbar and set the autolayout constraints as shown in the image. Make sure you add the height constraint for the UIView. Within the UIView drag a label and set the constraints for the label as shown in the image below.
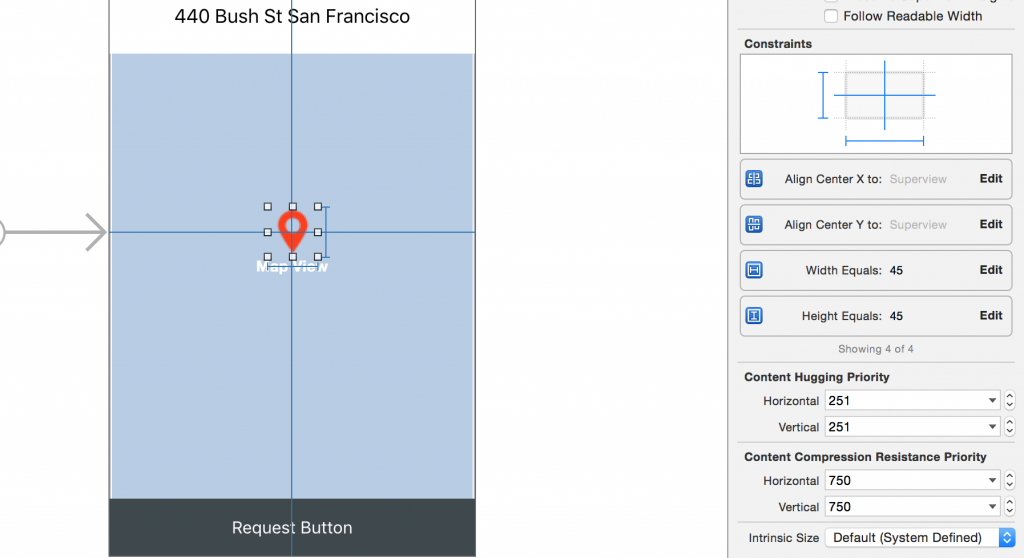
Now for showing the reference point lets drag a UIImageView of 45 X 45 and set the image to the location icon which we imported before

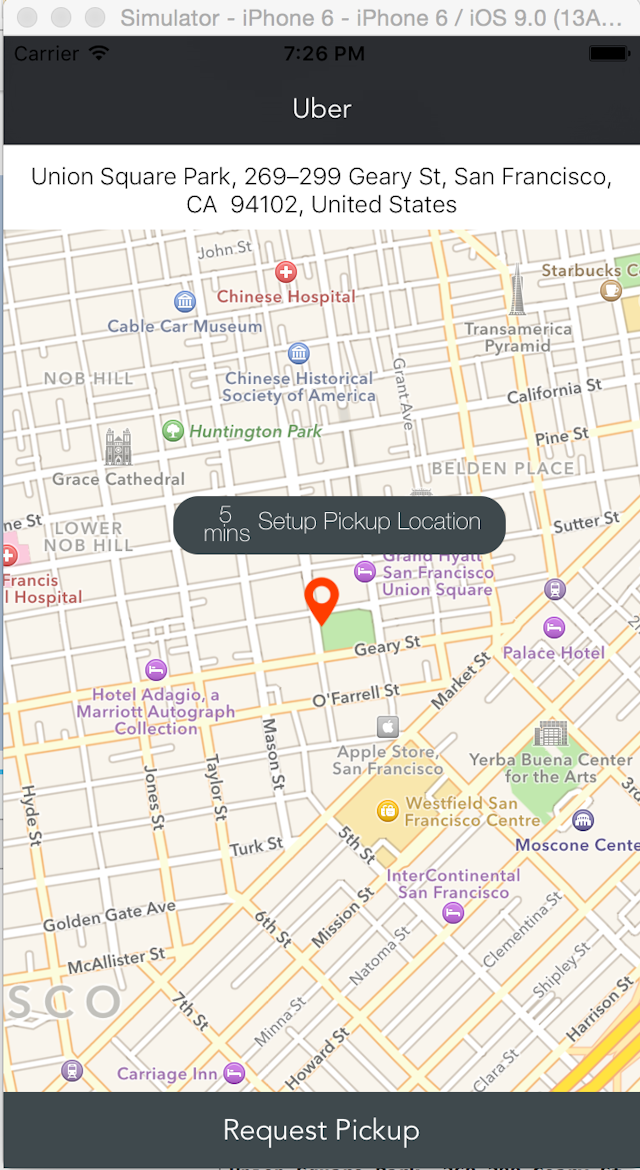
If you go ahead and run the application we will get a simple view with a default address , a mapview and a button. If you prefer watching a video take a look at the video below. Also once you are done with the part 1 make sure you checkout the Part 2 of building an uber app in Swift